How to Automate Setup of AWS EC2 with Internet Gateway and SSH Access enabled using Terraform
In this post, we are going to learn about the usage of Terraform to automate the setup of AWS EC2 instance with internet gateway and ssh access enabled.
1. Prerequisites
1.1. Terraform CLI
Ensure terraform CLI is available. If not, then do install it first.
1.2. Individual AWS IAM user
Prepare a new individual IAM user with programmatic access key enabled and have access to EC2 management. We will use the access_key and secret_key on this tutorial.
1.3. ssh-keygen and ssh commands
Ensure both ssh-keygen and ssh command are available.
2. Preparation
Create a new folder contains a file named infrastructure.tf. We will use the file as the infrastructure code. Every resource setup will be written in HCL language inside the file, including:
- Uploading key pair (for ssh access to the instance).
- Creating EC2 instance.
- Adding security group to VPC (where the instance will be created).
- Creating a public subnet.
- Creating an internet gateway and associate it to the subnet.
Ok, let's back to the tutorial. Now create the infrastructure file.
mkdir terraform-automate-aws-ec2-instance
cd terraform-automate-aws-ec2-instance
touch infrastructure.tf
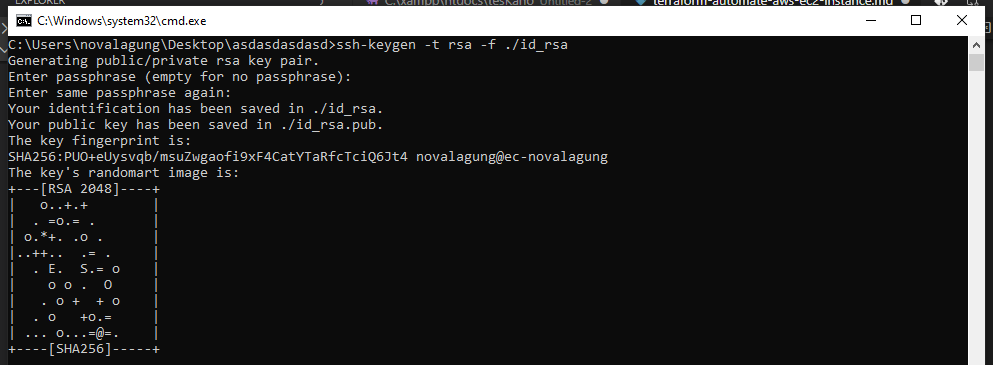
Next, create a new public-key cryptography using ssh-keygen command below. This will generate the id_rsa.pub public key and id_rsa private key. Later we will upload the public key into AWS and use the private key to perform ssh access into the newly created EC2 instance.
cd terraform-automate-aws-ec2-instance
ssh-keygen -t rsa -f ./id_rsa

3. Infrastructure Code
Now we shall start writing the infrastructure config. Open infrastructure.tf in any editor.
3.1. Define AWS provider
Define the provider block with AWS as chosen cloud provider. Also define these properties: region, access_key, and secret_key; with values derived from the created IAM user.
Write a block of code below into infrastructure.tf
provider "aws" {
    region = "ap-southeast-1"
    access_key = "AKIAWLTS5CSXP7E3YLWG"
    secret_key = "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"
}
3.2. Generate new key pair then upload to AWS
Define new aws_key_pair resource block with local name: my_instance_key_pair. Put the previously generated id_rsa.pub public key inside the block to upload it to AWS.
resource "aws_key_pair" "my_instance_key_pair" {
    key_name = "terraform_learning_key_1"
    public_key = file("id_rsa.pub")
}
3.3. Create a new EC2 instance
Define another resource block, but this one will be the aws_instance resource. Name the EC2 instance as my_instance, then specify the values of VPC, instance type, key pair, security group, subnet, and public IP within the block.
Each part of the code below is self-explanatory.
# create a new AWS ec2 instance.
resource "aws_instance" "my_instance" {

    # ami => Amazon Linux 2 AMI (HVM), SSD Volume Type (ami-0f02b24005e4aec36).
    ami = "ami-0f02b24005e4aec36"

    # instance type => t2.micro.
    instance_type = "t2.micro"

    # key pair: terraform_learning_key_1.
    key_name = aws_key_pair.my_instance_key_pair.key_name

    # vpc security groups: my_vpc_security_group.
    vpc_security_group_ids = [aws_security_group.my_vpc_security_group.id]

    # public subnet: my_public_subnet.
    # this subnet is used as the gateway of the internet.
    subnet_id = aws_subnet.my_public_subnet.id

    # associate one public IP address to this particular instance.
    associate_public_ip_address = true
}
The key_name property filled with a value coming from the my_instance_key_pair that we defined previously. Statement aws_key_pair.my_instance_key_pair.key_name return the key_name of the particular key pair, in this example it is terraform_learning_key_1.
For both vpc_security_group_ids and subnet_id, the values are taken from another resource block, similar to the key_name. However, for these two properties, we haven't defined the resource block yet.
Btw, property vpc_security_group_ids accept an array of string as the value, so that's why it's wrapped inside []. Even it is only one security group, the value needs to be in an array format.
3.4. Allocate a VPC resource with a security group attached to it
Allocate a VPC resource block, and then define a security group resource within the VPC.
# allocate a VPC named my_vpc.
resource "aws_vpc" "my_vpc" {
    cidr_block = "10.0.0.0/16"
    enable_dns_hostnames = true
}

# create a security group for my_vpc.
resource "aws_security_group" "my_vpc_security_group" {

    # tag this security group to my_vpc.
    vpc_id = aws_vpc.my_vpc.id

    # define the inbound rule, allow TCP/SSH access from anywhere.
    ingress {
        from_port = 22
        to_port = 22
        protocol = "tcp"
        cidr_blocks = ["0.0.0.0/0"]
    }

    # define the inbound rule, allow TCP/HTTP access on port 80 from anywhere.
    ingress {
        from_port = 80
        to_port = 80
        protocol = "tcp"
        cidr_blocks = ["0.0.0.0/0"]
    }

    # define the outbound rule, allow all kinds of accesses from anywhere.
    egress {
        from_port = 0
        to_port = 0
        protocol = "-1"
        cidr_blocks = ["0.0.0.0/0"]
    }
}
Above security group is created for my_vpc (see vpc_id = aws_vpc.my_vpc.id). This particular VPC has three inbound/outbound rules:
- Allow ssh access from anywhere. Later we need to remotely connect to the instance to see whether it's properly set up or not.
- Allow incoming access through port
80. This might be required, so we can perform any tools/dependency installations, etc. - Allow all kinds of outgoing accesses from anywhere. By doing this we will be able to perform remote access, download, etc to anywhere from the instance.
ingress is equivalent to inbound, and egress for outbound
3.5. Allocate new public subnet to VPC
We have defined a VPC my_vpc with CIDR block 10.0.0.0/16 allocated. Now we shall create a subnet (for public access) with CIDR block slightly smaller, 10.0.0.0/24.
# create a subnet for my_vpc.
resource "aws_subnet" "my_public_subnet" {
    vpc_id = aws_vpc.my_vpc.id
    cidr_block = "10.0.0.0/24"
}
If we go back to the definition of my_instance block above, this particular subnet is attached there.
3.6. Create an internet gateway and route table association
Now create an internet gateway for my_vpc. Then attach it to a new route table for public access.
# create an internet gateway, tag it to my_vpc.
resource "aws_internet_gateway" "my_internet_gateway" {
    vpc_id = aws_vpc.my_vpc.id
}

# create a new route table for attaching my_internet_gateway into my_vpc.
resource "aws_route_table" "my_public_route_table" {
    vpc_id = aws_vpc.my_vpc.id
    route {
        cidr_block = "0.0.0.0/0"
        gateway_id = aws_internet_gateway.my_internet_gateway.id
    }
}
Associate the public route table above into my_public_subnet, so then we will get an internet access on my_instance instance.
# create a route table association to connect my_public_subnet with my_public_route_table.
resource "aws_route_table_association" "my_public_route_table_association" {
  subnet_id = aws_subnet.my_public_subnet.id
  route_table_id = aws_route_table.my_public_route_table.id
}
Pretty much everything is done, except we need to show the DNS or public IP of newly created instance, so then we can test it using ssh access. use the output block to print both public DNS and IP of the instance.
output "public-dns" {
    value = aws_instance.my_instance.*.public_dns[0]
}
output "public-ip" {
    value = aws_instance.my_instance.public_ip
}
The infra file is ready. Now we shall perform the terraforming process.
4. Run Terraform
4.1. Terraform initialization
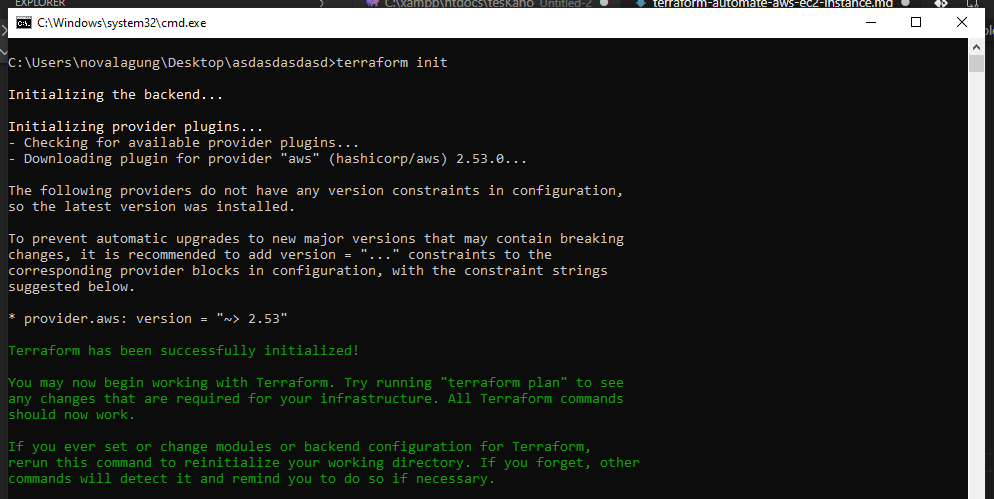
First, run the terraform init command. This command will do some setup/initialization, certain dependencies (like AWS provider that we used) will be downloaded.
cd terraform-automate-aws-ec2-instance
terraform init

4.2. Terraform plan
Next, run terraform plan, to see the plan of our infrastructure. This step is optional, however, might be useful for us to see the outcome from the infra file.
4.3. Terraform apply
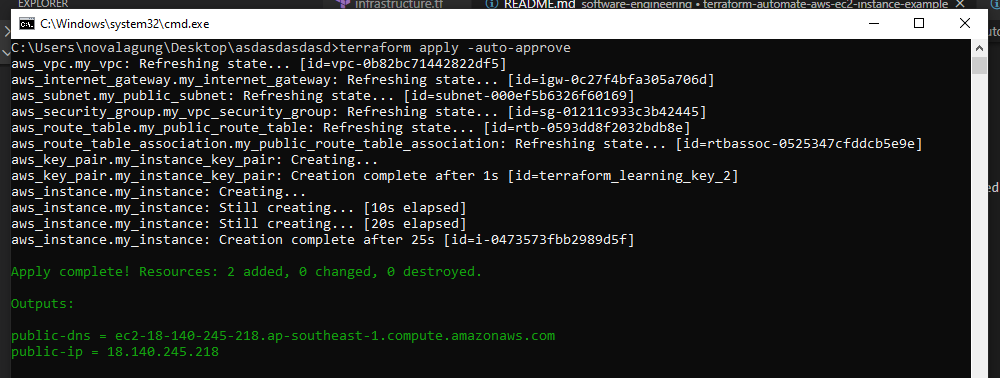
Last, run the terraform apply command to execute the infrastructure plan.
cd terraform-automate-aws-ec2-instance
terraform apply -auto-approve
The -auto-approve flag is optional, it will skip the confirmation prompt during execution.

In the infra file, we defined two outputs, DNS and public IP, it shows up after the terraforming process is done.
5. Test Instance
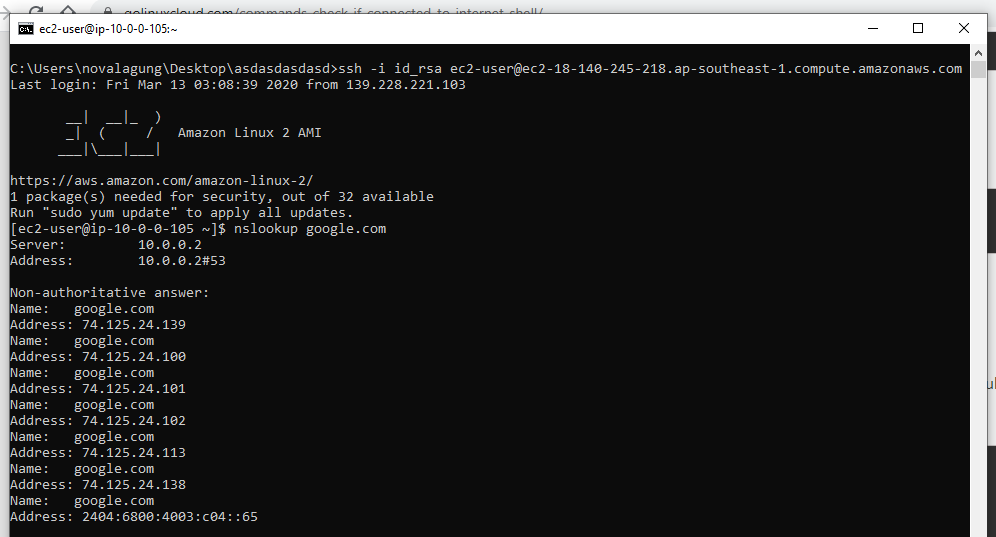
Now we shall test the instance. Use the ssh command to remotely connect to a particular instance. Either DNS or public IP can be used, just pick one.
ssh -i id_rsa [email protected]

We can see from the image above that we can connect to ec2 instance via SSH, and the instance is connected to the internet.